
Table of contents

We are excited that HubDialer’s new texting platform is live! Campaign managers, outreach specialists, fundraisers, nonprofits and other organizations can combine HubDialer’s powerful voice calling with texting to reach target individuals and large groups of people.
There is no doubt that texting is a powerful tool, but since it is a relatively new tool, we want to use this guide to show you how to set and use its two main options properly:
- Peer-to-peer texting
- Broadcast texting
So, let’s examine how to enable both options in HubDialer’s system.
Peer-to-peer texting
Here we will explain:
- How to get started with peer-to-peer
- How to manage your list
- How to work with scripts
- How to confirm and launch a campaign
Let’s begin.
Getting Started
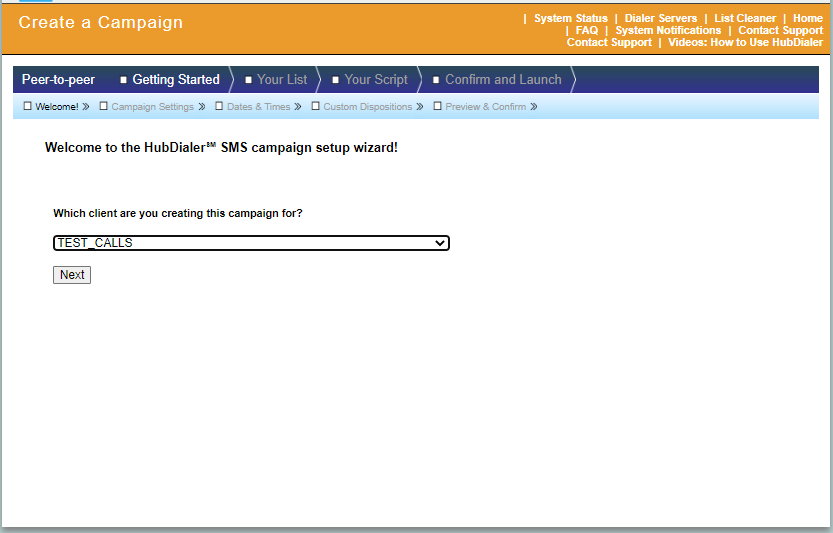
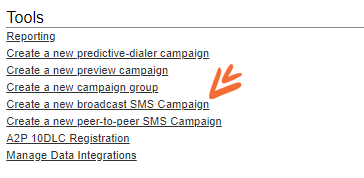
The first thing you will need to do is click “Create a new peer-to-peer SMS Campaign”.

Choose which client you’re creating this campaign for and proceed to general campaign settings:
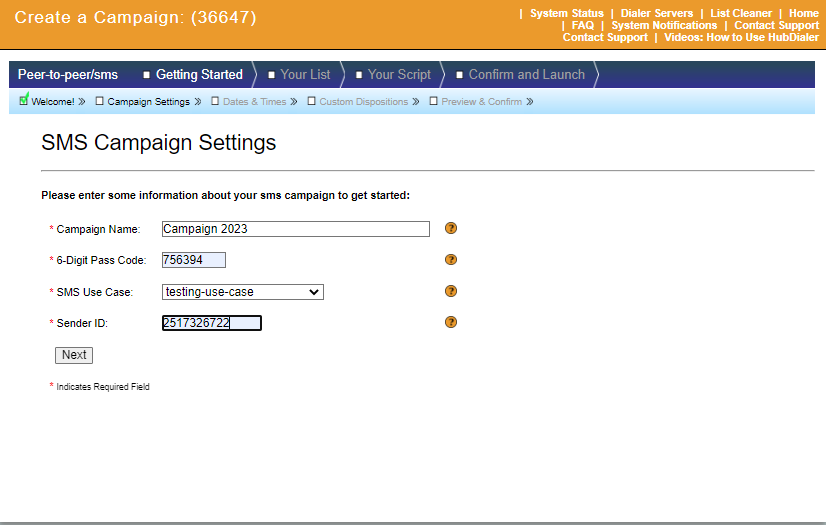
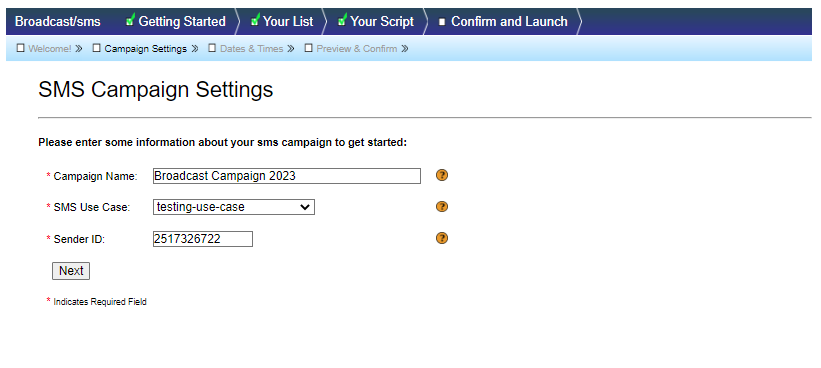
- Campaign settings ->Enter your campaign name, 6-digit passcode and sender ID
(You will need to include campaign use case selection)
- Dates & Time -> Choose the start date, end date, and daily time window for the campaign. Please note that the default timezone is EST.
- Custom dispositions -> Here, you can ADD custom dispositions if you wish. On the right-hand side, you can choose from the Favorite dispositions you have previously added. Once everything looks good, click next.
- Preview and confirm -> Check all the settings you have created. You can still make changes on this page, but if everything looks okay, click “confirm.”
Your list
After setting up the client and target options, you now need to prepare the list of contacts that you will send messages to.
Here are the options you have.
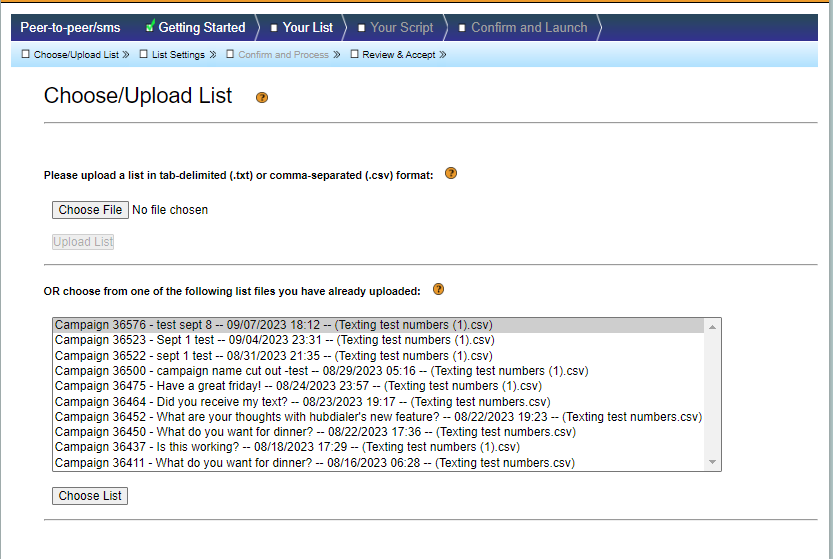
Choose/upload list
On this page, you can add a list of 1 of 3 ways
- you can upload a new .csv or .txt file for your contacts
- you can select from the previous lists you have uploaded
- or you can select a list recently imported via an API.
List settings
This is where you can choose which data you want to use in your scripts and reports. You can also select which data you do not wish to include by selecting “Do not Load” on the column header. You can also add custom headers as needed (i.e., Alternate phone number).
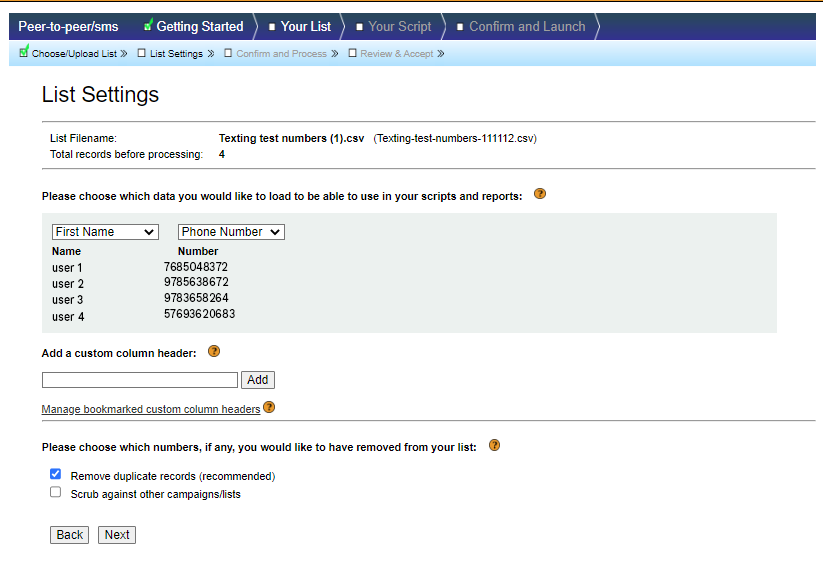
Choose if you want to remove any duplicates or scrub against other campaigns.
Click “Next” if everything is to your liking.
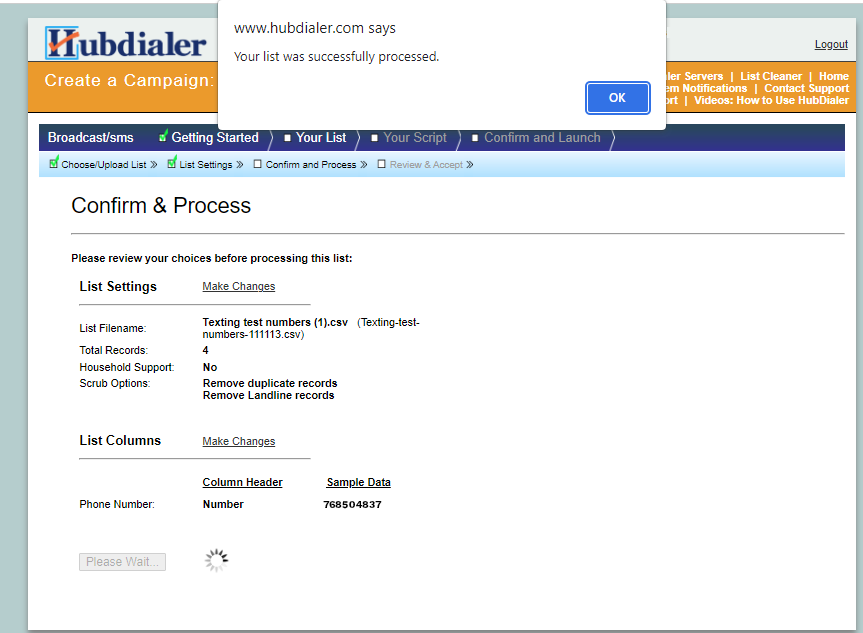
Confirm & Process
Check all the settings you have created. You can still make changes on this page, but if everything looks okay, click “Process List.”
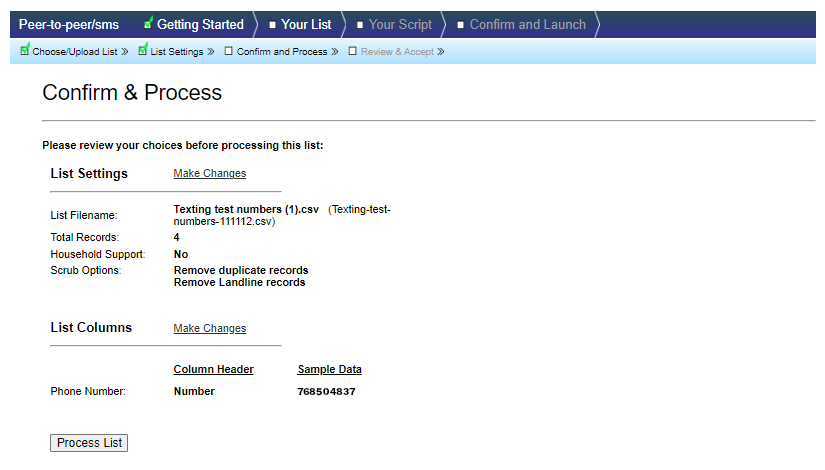
A pop-up will appear confirming that your list was processed. Click “OK”.

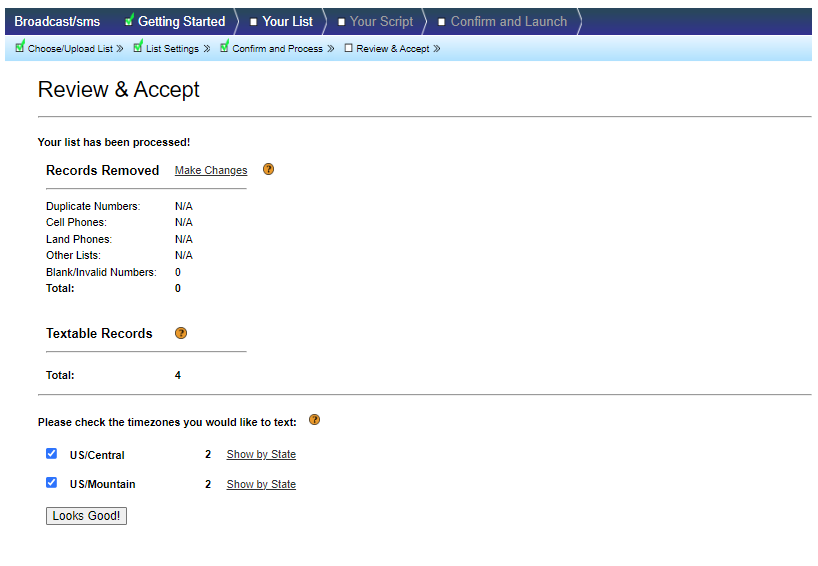
Review & Accept
Next, the system will show if there are any duplicates removed, the total textable records, and an accounting of contacts by time zones. If everything checks out, click “Looks Good”.

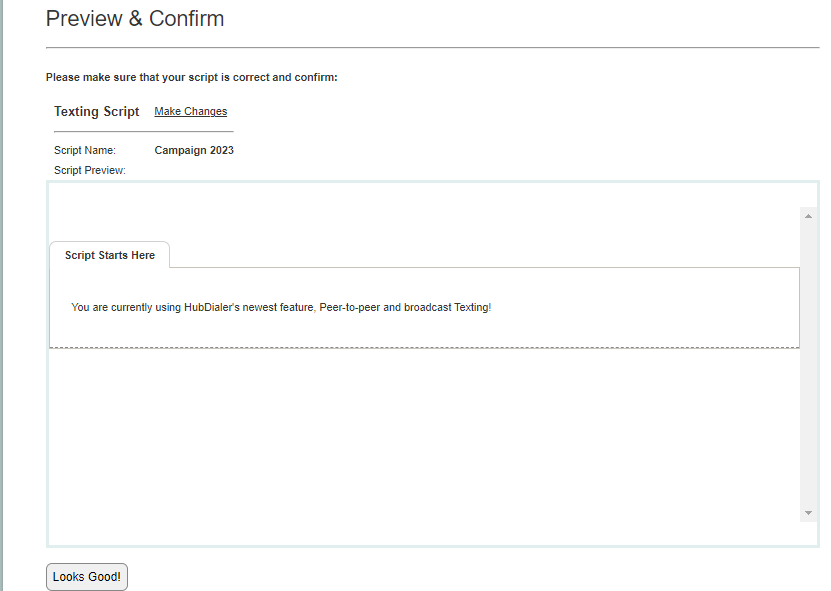
Your Script
Managing your script is pretty straightforward. You have two simple options in this step.
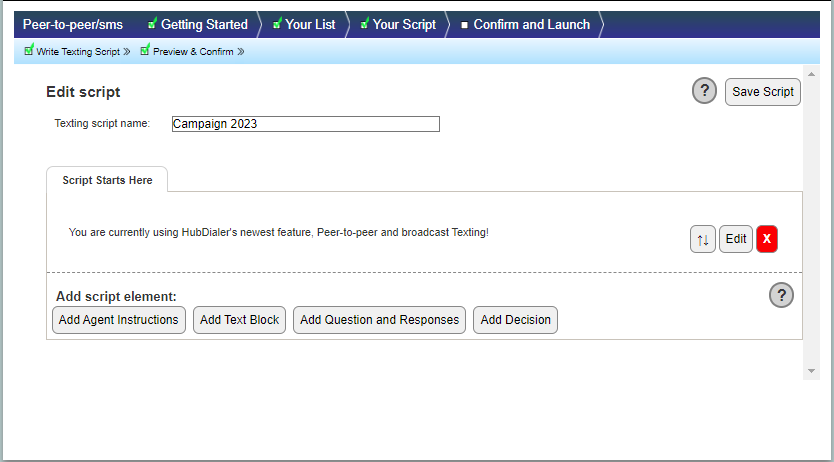
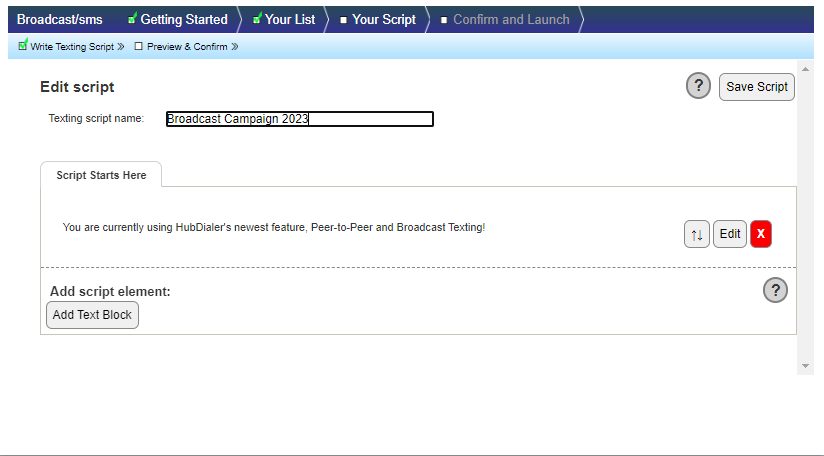
- Edit Script -> Add the script name and elements you want to use on your script.
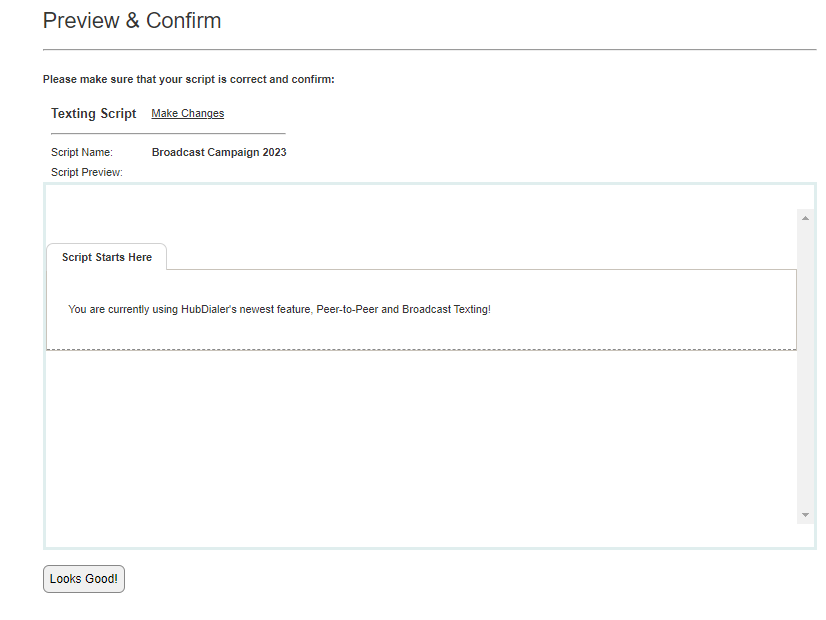
- Preview and confirm -> Here, you will be able to see the final version of your script. If everything is set, click “Looks Good”.
Confirm and Launch
The last step is to confirm your settings and launch the campaign. There is only one thing you need to pay attention to.
- Review Campaign Settings -> Here, you will be able to check the campaign settings you created, such as the time, passcode, campaign name, etc., and make edits if needed.
If everything looks good, click “Confirm”.
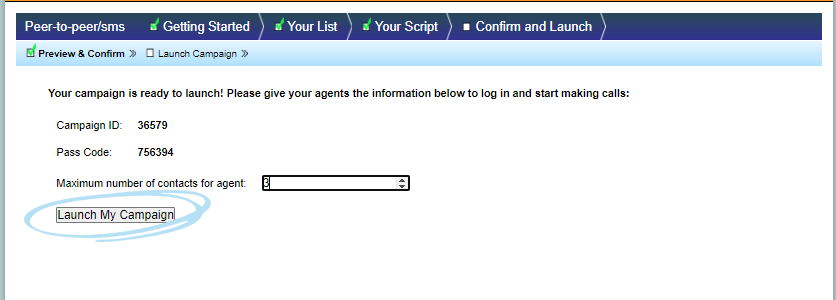
You will see the campaign ID and passcode you have entered on the initial part of campaign creation; this is the information that you will provide the agents so they can start making their calls. In this part, you will also indicate the maximum number of contacts for the agents. If everything is set, click “Launch my campaign”.
Broadcast texting
Here we will explain:
- How to get started with broadcast texting
- How to manage your list
- How to work with scripts
- How to confirm and launch a campaign
Let’s continue in the same way.
Getting Started
The first thing you will need to do is click ”Create a new broadcast SMS Campaign”.
Choose which client you are creating this campaign for and proceed to general campaign settings:
- Campaign settings ->Enter your campaign name and sender ID (will need to include campaign use case selection)
- Dates & Time -> Choose the start date, end date, and daily time window for the campaign. Please note that the default timezone is EST.
- Preview and confirm -> Check all the settings you have created. You can still make changes on this page, but if everything looks okay, click “confirm”.
Your list
After setting up the client and target options, you now need to prepare the list of contacts that you will send messages to.
Here are the options you have.
Choose/upload list
On this page, you can add a list of 1 of 3 ways
- you can upload a new .csv or .txt file for your contacts
- you can select from the previous lists you have uploaded
- or, you can choose a list recently imported via an API. Make sure to check the checkbox for the Opt-in confirmation.

List settings
Here, you can choose which data you want to use in your scripts and reports. You can also select which data you do not wish to include by choosing “Do not Load” as a column header. You can also add custom headers as needed.
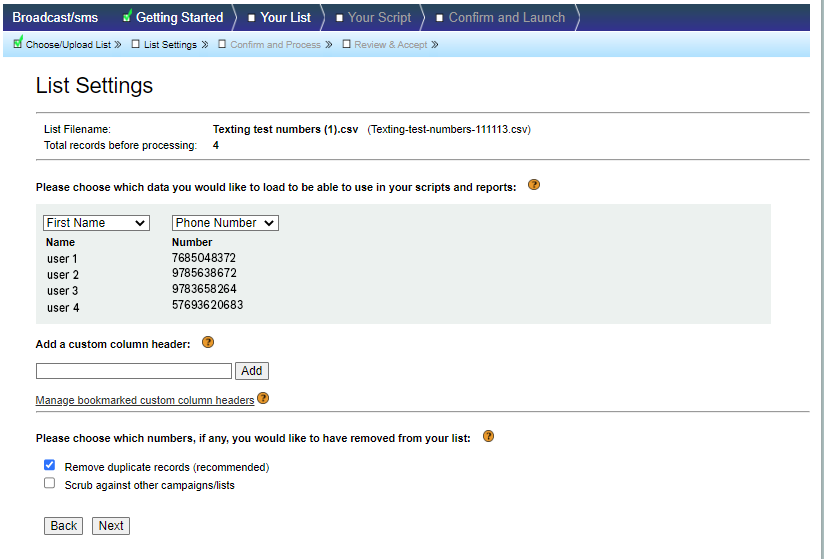
Click “Next” if everything is to your liking.
Confirm and Process
Check all the settings you have created. You can still make changes on this page, but if everything looks okay, click “Process List”.
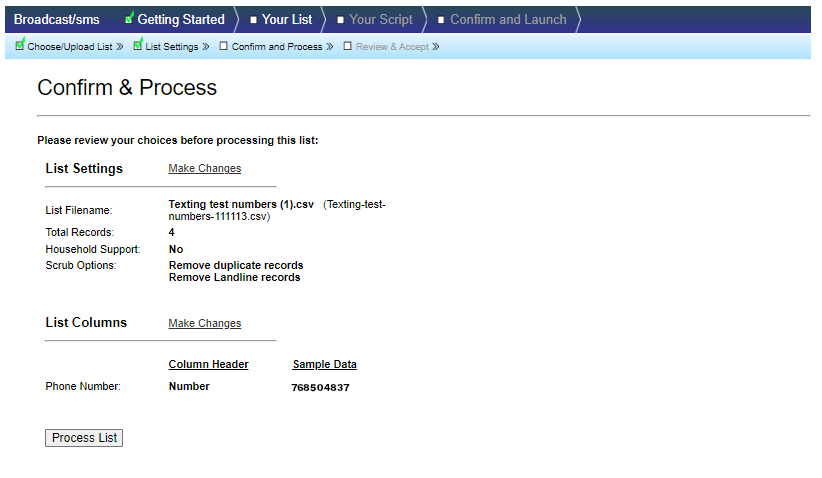
A pop-up will appear confirming that your list was processed. Click “OK”.
Review & Accept
Next, the system will show if there are any duplicates removed, the total textable records, and an accounting of contacts by time zones. If everything checks out, click “Looks Good”.
Your Script
Managing your script is, again, pretty straightforward. You have two simple options in this step.
- Edit Script -> Add the script name. In this case, you would only be able to use the “Text Block” element. You can also add/upload media for MMS. Once done, click “Save Script”.
- Preview & Confirm -> Here, you will be able to see the final version of your script. If everything is set, click “Looks Good”.
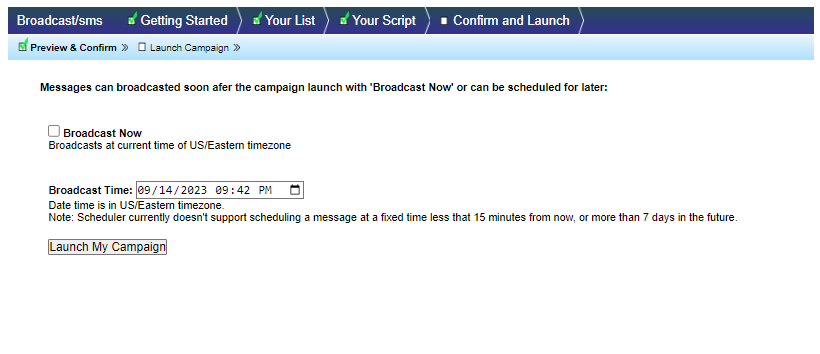
Confirm and Launch
The last step is to confirm your settings and launch the campaign. There is only one thing you need to pay attention to.
- Review Campaign Settings -> Here, you will be able to check the campaign settings you created, such as the time, passcode, campaign name, etc., and make edits if needed.
If everything looks good, click “Confirm”.
On the last page, you will have the option to “broadcast now,” which will launch the campaign right after clicking “launch my campaign,” or you can schedule the texts to be sent at a later time using the scheduler.
And that is it!
If you encounter difficulties or have questions, please see our support page and send us a message!